
I wanted to document some important steps I take setting up a new server for hosting ASP.Net Core apps. These steps change over time as versions and features change, but this post will serve as a good, general guide for things to consider and remember; both for myself and anyone else who stumbles across it!
Notes
The server I configured was running Windows 2019 Server Version 10.0.17763. It was also running IIS v10.0.17763.1, and had .Net Framework 3.5 installed already. Having .Net Framework installed is important for working with Azure Devops, which we’ll talk about later. Also, I am was lucky enough to have TLS certificates already installed for me.
First steps
First things first, make sure you can remote into the server, and make sure you can access it’s filesystem remotely. I typically use Microsoft Remote Desktop from the windows store (probably the only app I’ve ever used from the windows store). Once you’re in, make sure you have access to the %SystemDrive%\inetpub folder. Also ensure you have access to the IIS Manager.
dotnet hosting
This step is simple, but sometimes finding the install bundle isn’t. Start by going to the dotnet download page where you’ll see several available versions. I typically choose the current LTS version, but ultimately the version will need to match whatever version of dotnet your app is running.
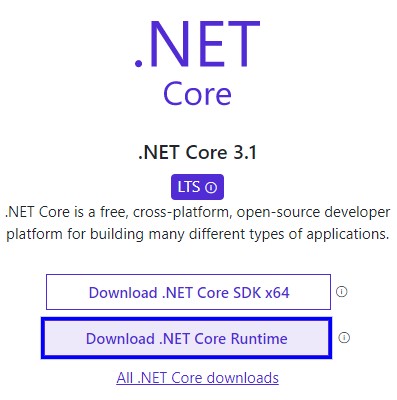
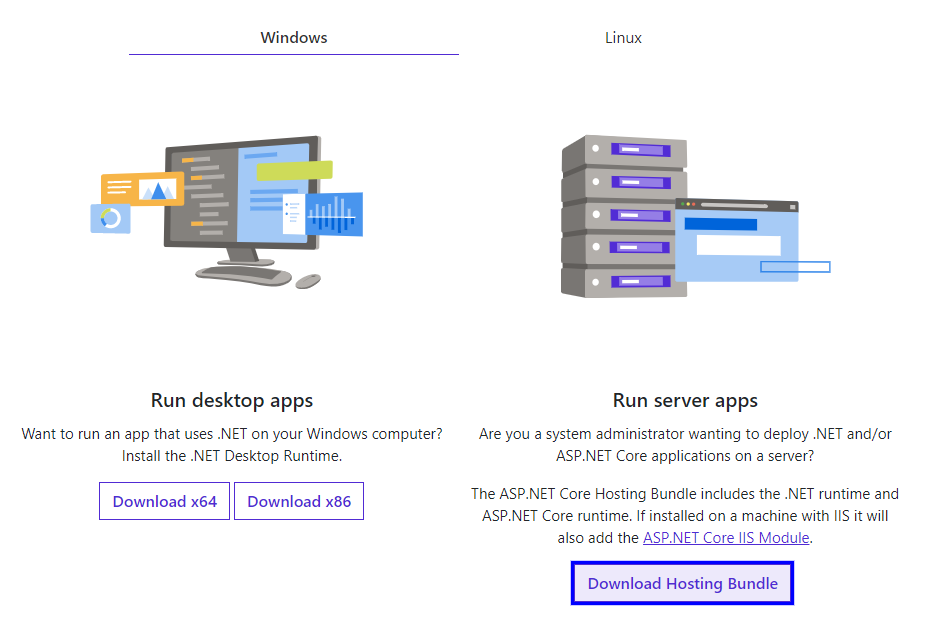
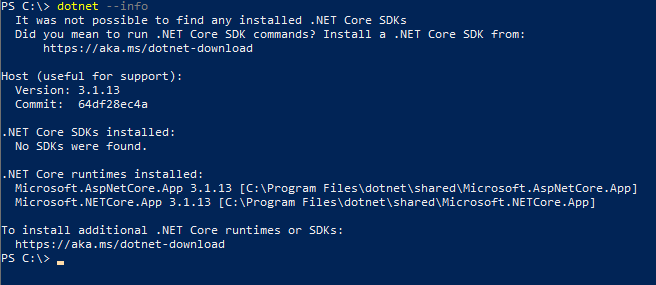
My app currently uses 3.1 LTS, so I’ll pick Download .NET Core Runtime under that version and then on the next page specifically choose Download Hosting Bundle. The hosting bundle is critical because it will install a necessary IIS ISAPI filter for ASP.NET Core. Once you have your bundle, simply install it on the server, and finally restart. To confirm your version is installed, run dotnet --info in powershell. The Host section should reflect the version you just installed.
Don’t be discouraged if you see a message saying It was not possible to find any installed .NET Core SDKs. The SDK is a separate install, and is not required for runtime.
IIS
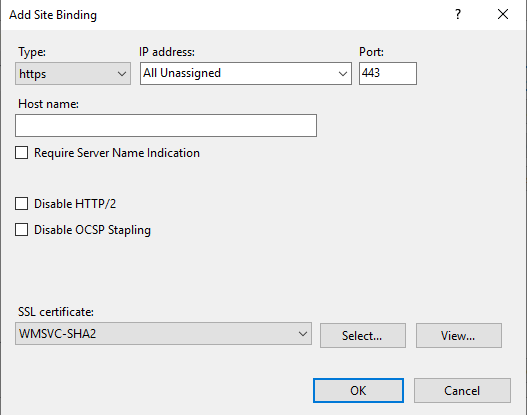
One of the first things I do when configuring IIS is set up the HTTPS binding.
To do this, choose the website that will respond to HTTPS requests from the left menu, often the default, and click bindings on the right menu. Click Add… and select type https. For my purposes, IP address is set to All Unassigned and the port stays the default 443. Last but not least I select the certificate I want to use below. This should align with whatever your server url will be. As I said before, my certificates came preinstalled, so I just had to choose the right one.
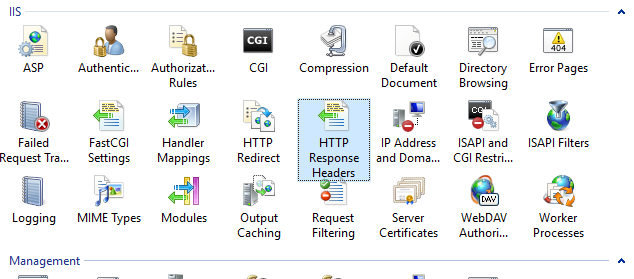
Next I add some security minded headers to the default return headers. In the root server options (Server name on the left side menu), find HTTP Response Headers in the IIS section. The two headers I always add are:
X-Content-Type-Options:nosniffX-Frame-Options:deny
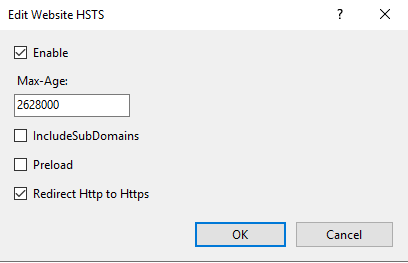
Usually I would add and HSTS header here also, but in IIS for server 2019 there is a new, easy way to manage this. Going back to the website you previously configured to response to https requests, there is now a HSTS button near the bottom of the right hand menu. I enable HSTS and configured max-age to 2628000 (1 Month). I also check Redirect Http to Https. Keep in mind, if you’re going to make certificate changes or run the app over unsecured HTTP, you’ll want to set the max-age low or you will be stuck making TLS requests for the set duration, even if you change it later
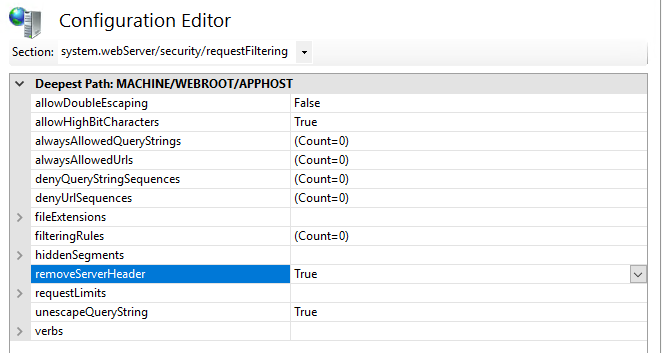
Next I remove the Server and X-Powered-By headers. You should have seen X-Powered-By in root server options HTTP Response Headers. Delete it to remove it from the default response headers. The Server header is a bit more tricky. In the root server options, find Configuration Editor in the Management section. Then go to section system.webServer/security/requestFiltering and set removeServerHeader to true. Once you click apply on the right menu, the header should be removed.
IIS should now be upgrading all requests to HTTPS automatically, and a response should only return the desired headers.
The WebDAV problem
By default PUT and DELETE requests are handled by WebDav. If you are going to use those verbs in your ASP.Net Core app, then you’ll need to disable WebDAV or it will try and respond to any of your legitimate requests using those verbs. The best way to do this is to go into the IIS base configuration file, usually found at %SystemDrive%\windows\system32\inetsrv\config \applicationHost.config, and comment out the following line in the modules section:
1
<add name="WebDAVModule" lockItem="true" />
This is the only way I’ve found to prevent WebDAV from interfering with PUT and DELETE verb requests.
Installing the agent
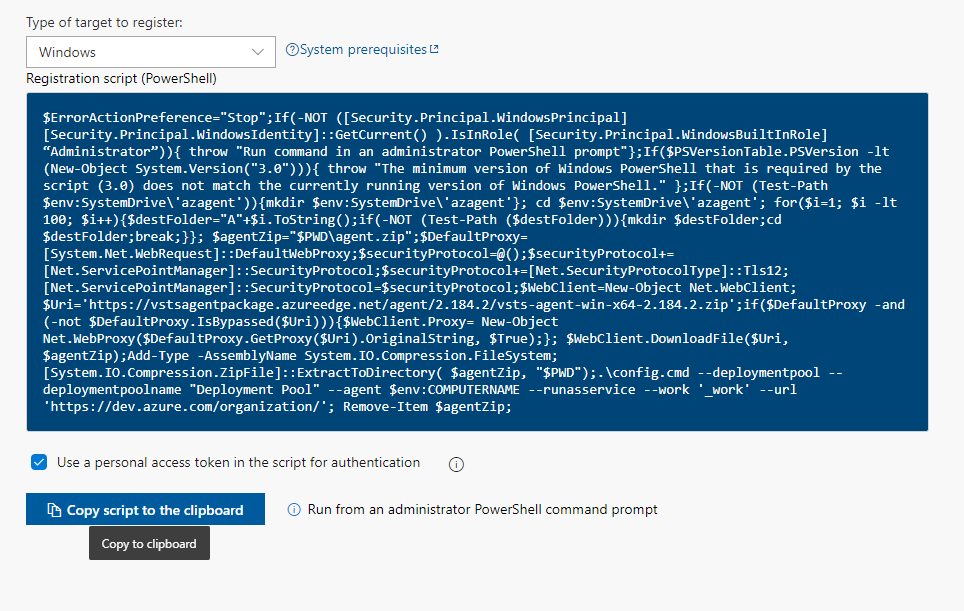
Finally, I always install an Azure Devops agent. In Azure Devops > Organization Settings > Deployment pools, I click new on the top menu. Setting the deployment pool name and projects I want to allow deployments to, I create the new pool. From here, you should see the details tab of the new pool. On the right is the agent install powershell script. I usually check Use a personal access token in the script for authentication. You’ll need to run this script on the server in an elevated powershell window (as Administrator). Once this is complete, you should see your server appear in the Deployment Pool’s Targets tab.
Wrapping up
You’re server should be responding and ready to run ASP.Net Core applications. This is obviously not an exhaustive guide, but it should be a good starting point for your new server.